
Charles Proxy on Android: Complete Setup Guide 2026
Mobile app developers, security researchers, and network administrators often need to inspect network traffic on Android devices to debug API calls, monitor security vulnerabilities, or analyze data flow patterns. Setting up charles proxy on android devices provides powerful capabilities for intercepting, analyzing, and modifying HTTP and HTTPS requests in real time. This comprehensive guide walks through everything you need to know about configuring Charles Proxy on Android in 2026, from initial installation to advanced troubleshooting techniques.
Understanding Charles Proxy and Its Android Applications
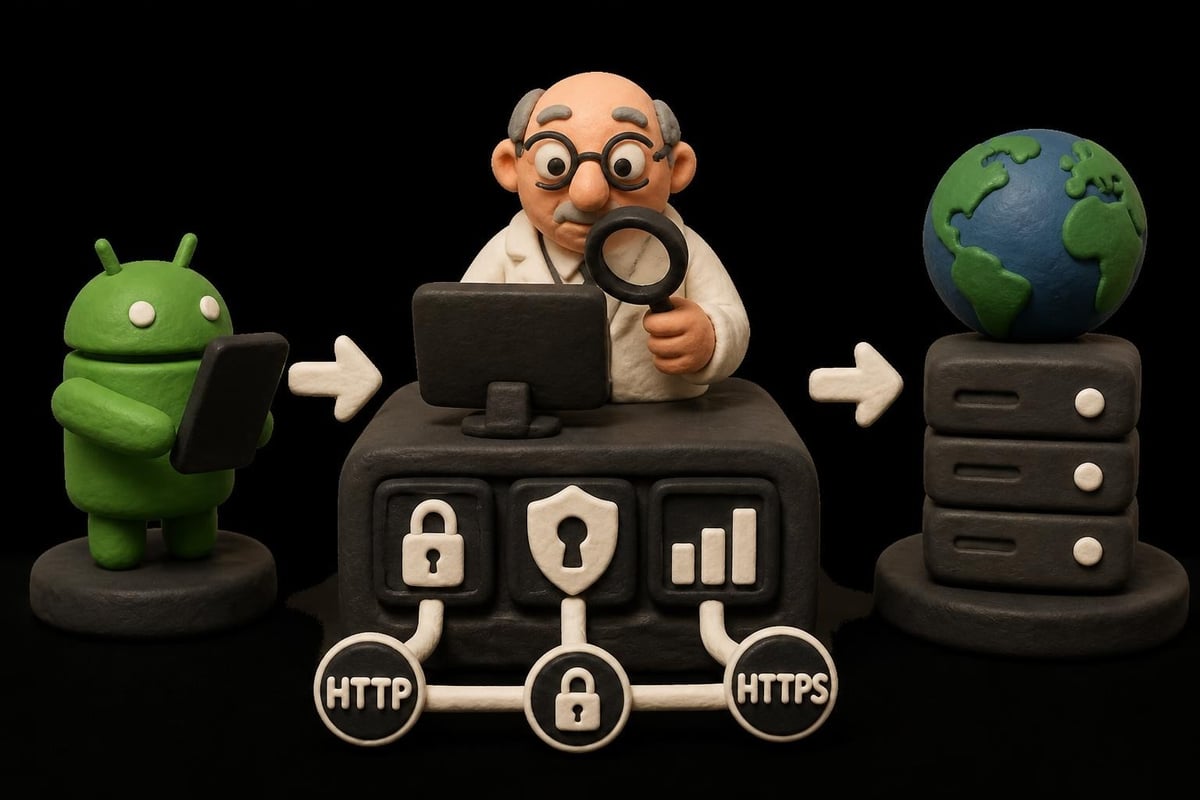
Charles Proxy functions as an HTTP proxy server and HTTP monitor that sits between your Android device and the internet. When properly configured, it captures all network requests made by apps on your device, displaying detailed information about headers, cookies, request bodies, and response data.
Key capabilities include:
- Real-time traffic monitoring and analysis
- SSL/TLS certificate interception for HTTPS traffic
- Request and response modification
- Bandwidth throttling simulation
- API endpoint testing and debugging
The tool proves invaluable for developers building mobile applications who need to verify API integrations, test error handling, or identify performance bottlenecks. Security professionals use it to audit app communications and identify potential data leaks. When combined with professional proxy services, charles proxy on android becomes even more powerful for tasks requiring IP rotation or geographic testing.
Why Developers Choose Charles Proxy
Unlike simpler network monitoring tools, Charles Proxy offers granular control over request modification and detailed protocol analysis. The comprehensive debugging features make it the industry standard for mobile development teams.
For businesses running web scraping operations or API testing at scale, combining Charles with datacenter proxies creates a robust testing environment. This combination allows developers to monitor exactly how their applications interact with proxy services while maintaining production-level performance.
Initial Setup Requirements for Android Devices
Before diving into charles proxy on android configuration, ensure you have the necessary components ready. Charles Proxy must be installed on your computer (Windows, macOS, or Linux), and your Android device needs to connect to the same Wi-Fi network as your development machine.
System Requirements Checklist
| Component | Requirement | Notes |
|---|---|---|
| Charles Proxy Version | 4.6 or higher | Available from charlesproxy.com |
| Android Version | 7.0 (Nougat) or higher | Earlier versions have different SSL handling |
| Network Connection | Wi-Fi (same network) | USB debugging optional but recommended |
| Computer OS | Windows/Mac/Linux | Any modern operating system |
Your Android device must allow proxy configuration in WiFi settings. Most modern Android versions support this natively, though some heavily customized manufacturer ROMs may have restrictions.
Configuring Charles Proxy on Your Computer
Launch Charles Proxy on your development machine and navigate to the Proxy menu. Select "Proxy Settings" and verify that the port is set to 8888 (the default). This port number becomes important when configuring your Android device.
Enable external proxy connections:
- Open Charles Proxy preferences
- Navigate to "Proxy" tab
- Check "Enable transparent HTTP proxying"
- Under "External Proxy Settings," ensure no conflicting proxies exist
The computer running Charles needs a static IP address on your local network, or at least an IP that won't change during your debugging session. Note this IP address as you'll enter it on your Android device shortly.
SSL Proxying Configuration
Charles Proxy requires specific SSL configuration to intercept HTTPS traffic. Navigate to Proxy > SSL Proxying Settings and check "Enable SSL Proxying." Add locations you want to intercept by clicking "Add" and entering specific hosts or using wildcards like *:443 to capture all HTTPS traffic.
For monitoring mobile proxy connections or testing how your apps interact with proxy servers, adding your proxy provider's domains ensures complete visibility into encrypted communications.
Setting Up Android WiFi Proxy Connection
On your Android device, open Settings and navigate to WiFi connections. Long-press the connected network name and select "Modify network" or "Network settings" (terminology varies by Android version and manufacturer).
Scroll down to find Advanced Options and change the Proxy setting from "None" to "Manual." This reveals additional configuration fields where you'll enter your Charles Proxy details.
Proxy Configuration Fields
Enter these values:
- Proxy hostname: Your computer's local IP address (e.g., 192.168.1.100)
- Proxy port: 8888 (or your custom Charles port)
- Bypass proxy for: Leave blank unless you have specific exclusions
Save the configuration and return to your home screen. Charles Proxy should immediately prompt you on your computer asking whether to allow connections from your Android device's IP address. Click "Allow" to establish the connection.
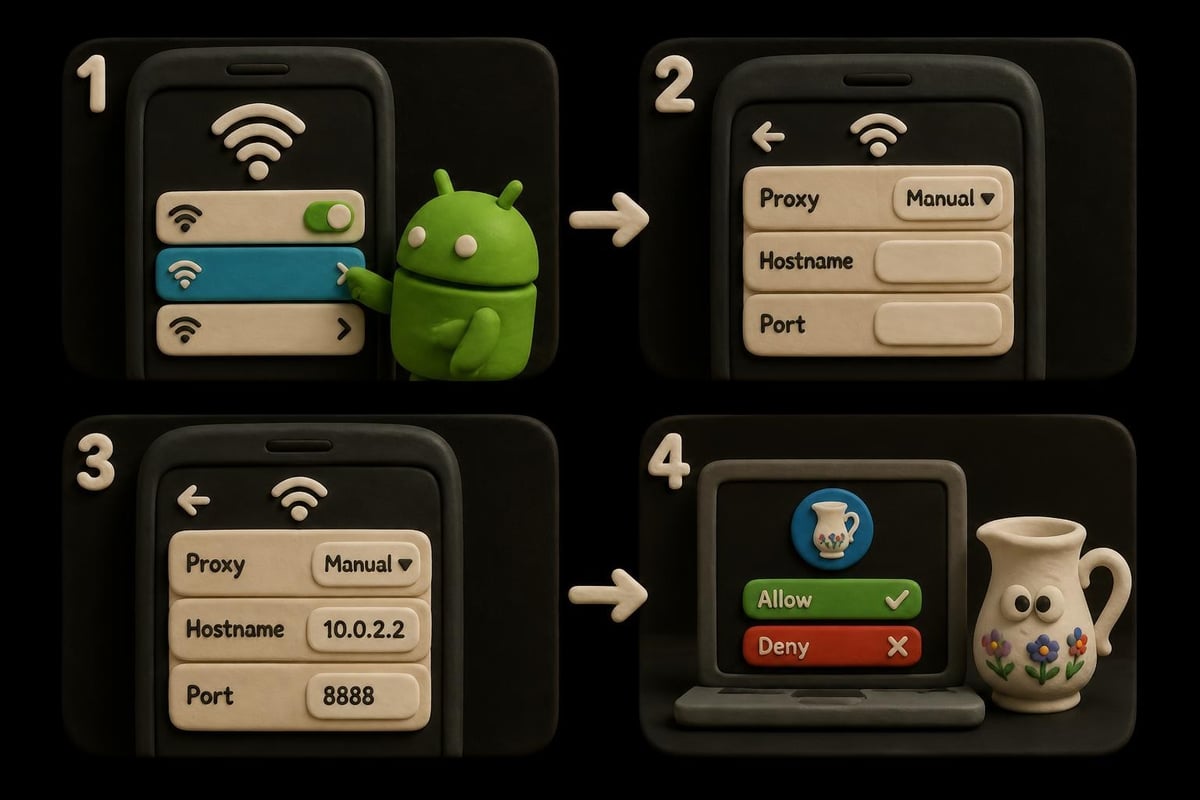
You should now see traffic appearing in Charles Proxy as you browse websites or use apps on your Android device. However, HTTPS traffic will still show as "unknown" until you install the SSL certificate.
Installing Charles SSL Certificate on Android
The critical step for intercepting HTTPS traffic when using charles proxy on android involves installing Charles's root SSL certificate on your device. Without this certificate, encrypted traffic remains unreadable, defeating much of the purpose of using Charles.
Certificate Download Process
- With your Android connected to Charles Proxy, open Chrome or your default browser
- Navigate to
chls.pro/sslorcharlesproxy.com/getssl - The certificate file downloads automatically
- You may see a notification about installing the certificate
The official Google Developers guide for Charles Proxy setup provides additional context for devices running Android N or higher, which introduced stricter certificate security requirements.
Installing the Certificate (Android 11+)
Modern Android versions require specific steps to install user certificates. Open Settings and navigate to Security > Encryption & credentials > Install a certificate (exact path varies by manufacturer).
Select "CA certificate" and confirm you understand the risks. Locate the downloaded Charles certificate file (usually in Downloads folder) and tap it. You'll be prompted to name the certificate - use something recognizable like "Charles Proxy 2026."
For Android 7-10, the process involves Settings > Security > Install from storage, selecting the certificate, and choosing "VPN and apps" as the credential use type.
Configuring App-Specific Network Security
Android 7.0+ introduced Network Security Configuration that prevents apps from trusting user-installed certificates by default. This means even with Charles's certificate installed, many apps won't allow traffic interception without additional configuration.
Application Manifest Modifications
If you're debugging your own app, you need to modify the AndroidManifest.xml file to include a network security configuration. Create a file named network_security_config.xml in your res/xml directory:
<network-security-config>
    <debug-overrides>
        <trust-anchors>
            <certificates src="user" />
        </trust-anchors>
    </debug-overrides>
</network-security-config>
This configuration only affects debug builds, maintaining security in production releases. Reference this file in your manifest's application tag with android:networkSecurityConfig="@xml/network_security_config".
The detailed configuration guide at Codexpedia walks through various scenarios for different Android versions and security requirements.
Verifying Your Charles Proxy Setup
After completing configuration, verification ensures everything works correctly. Open a browser on your Android device and visit any HTTPS website. In Charles Proxy on your computer, you should see the requests appearing with readable content.
| Test Type | Expected Result | Troubleshooting |
|---|---|---|
| HTTP traffic | Fully visible requests/responses | Check proxy IP and port |
| HTTPS traffic | Decrypted SSL content | Verify certificate installation |
| App traffic | API calls visible | Check network security config |
| Proxy rotation | Multiple IP addresses shown | Confirm proxy service integration |
Launch various apps and observe their network behavior in Charles. Successfully configured charles proxy on android setups display app names, request URLs, status codes, and full request/response bodies.
Common Verification Mistakes
Many users incorrectly assume certificate installation succeeded when it didn't. Navigate to Settings > Security > Trusted credentials > User tab to verify your Charles certificate appears in the list. If absent, repeat the installation process.
Another frequent issue involves the Android device and computer being on different network subnets. Both must share the same local network without VPN or firewall interference blocking port 8888.
Advanced Traffic Analysis Techniques
Once basic charles proxy on android configuration works, leverage advanced features for deeper analysis. The Structure view organizes requests by host, making it easy to identify which services your apps contact. The Sequence view shows chronological request ordering, useful for understanding app initialization flows.
Powerful analysis features:
- Repeat requests with modified parameters
- Compare request/response differences
- Export session data for reporting
- Set breakpoints to pause and modify requests
- Apply bandwidth throttling to simulate poor networks
When testing how applications interact with HTTP proxy services, Charles reveals exactly which headers apps send, how they handle proxy authentication, and whether they properly respect proxy protocols.
Request Filtering and Focusing
Charles captures everything by default, which can overwhelm analysts. Use the Filter feature (top-right search box) to display only specific domains or paths. Right-click any host in the Structure view and select "Focus" to hide all other traffic temporarily.
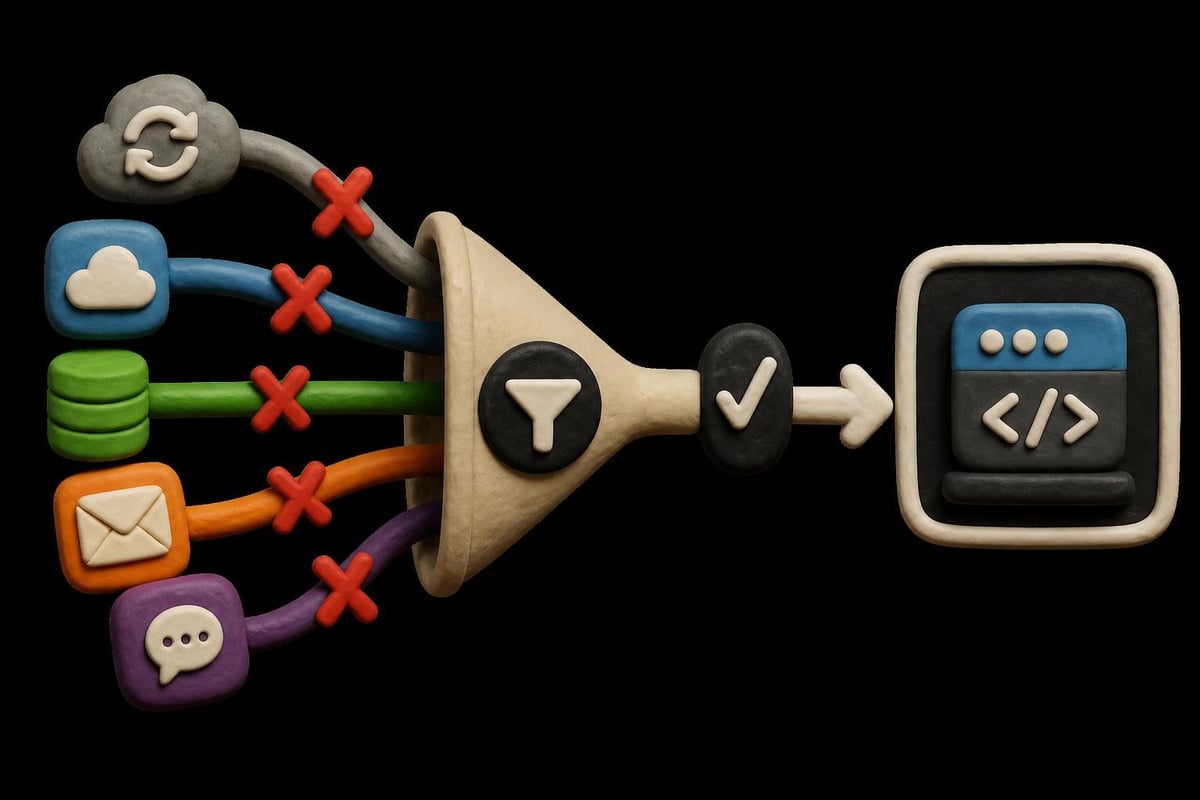
For complex debugging scenarios involving multiple proxy layers, create Recording Settings that automatically filter traffic to only the domains you're testing. This proves particularly valuable when working with residential proxies where you need to verify specific geographic routing.
Troubleshooting Connection Issues
Even with careful configuration, charles proxy on android setups sometimes encounter connectivity problems. The most common issue involves Android devices losing internet access after proxy configuration, often caused by firewall settings blocking Charles.
Internet Connection Lost
When your Android shows "Connected, no internet" after proxy setup, troubleshooting steps include verifying Charles is running, checking Windows Firewall allows Charles through, and confirming the computer's IP address hasn't changed.
Systematic troubleshooting approach:
- Verify Charles Proxy is actively running on your computer
- Check that Windows Defender or antivirus isn't blocking port 8888
- Temporarily disable computer firewall to test connectivity
- Confirm Android and computer share the same WiFi network
- Try using computer's hostname instead of IP address
Some corporate or public WiFi networks prevent proxy connections entirely through network policies. Testing on a home network or mobile hotspot can confirm whether network restrictions cause the issue.
SSL Handshake Failures
If you see "SSL Handshake Failed" messages in Charles, the certificate installation likely didn't complete properly. Uninstall the Charles certificate from Android's trusted credentials, restart both devices, and repeat the certificate installation process.
Android 12 and 13 introduced additional certificate pinning restrictions that some apps use to prevent interception. For these apps, only debugging builds with modified network security configurations will allow Charles inspection.
Integrating Charles with Proxy Services
Developers testing applications that use proxy services need to monitor the entire connection chain. Configure Charles to work with your proxy provider by adding external proxy settings that route traffic through your proxy service while still capturing it locally.
In Charles, navigate to Proxy > External Proxy Settings and add your proxy details. For SOCKS5 proxy services, configure the SOCKS proxy type and enter your proxy credentials. This creates a chain where Android → Charles → External Proxy → Internet, allowing full visibility into both hops.
Testing Proxy Rotation and Performance
When developing applications that implement proxy rotation for scraping or automation, Charles helps verify rotation timing and IP variety. The Timeline view displays request timing, revealing whether rotation introduces latency.
| Metric | Measurement Method | Optimization Target |
|---|---|---|
| Rotation Speed | Time between IP changes | < 1 second |
| Connection Overhead | First byte time comparison | Minimal increase |
| Success Rate | Successful vs. failed requests | > 99% |
| Geographic Distribution | IP geolocation tracking | Matches requirements |
Export session data to CSV format for quantitative analysis of proxy performance across hundreds or thousands of requests. This data proves invaluable when evaluating proxy providers or optimizing application retry logic.
Security Considerations and Best Practices
Using charles proxy on android creates security implications that users must understand. Installing the Charles certificate essentially creates a man-in-the-middle scenario where Charles can decrypt all HTTPS traffic. Only use this configuration on development devices with test data, never on devices containing sensitive personal information.
Security best practices:
- Remove the Charles certificate when not actively debugging
- Never install Charles certificates on production devices
- Use different devices for development testing vs. personal use
- Regularly audit installed certificates in Android settings
- Implement certificate pinning in production apps to prevent unauthorized interception
Organizations should establish policies around development device management, ensuring team members understand the risks of proxy debugging tools. The same capabilities that make Charles valuable for debugging can expose sensitive data if misused.
Privacy Protection in Development Workflows
When working with client data or production API keys, consider using mock services and test credentials exclusively during Charles debugging sessions. Many developers maintain separate development and production configurations specifically to avoid accidentally exposing real credentials through network inspection tools.
For teams working with mobile proxies or other privacy-sensitive services, implement strict protocols around session recording and data retention. Charles allows saving complete session files, which may contain authentication tokens or personal information that requires secure handling.
Performance Monitoring and Optimization
Beyond debugging, charles proxy on android serves as a powerful performance monitoring tool. The Timeline view provides waterfall charts showing DNS lookup, connection establishment, SSL handshake, and data transfer times for each request.
Identify slow API endpoints by sorting requests by duration. The "Chart" menu offers various visualization options including request size distribution and response code summaries. These metrics help optimize mobile app performance before users experience slowdowns.
Network Condition Simulation
The Throttle Settings feature simulates various network conditions including 3G, 4G, and custom bandwidth limitations. This testing reveals how applications behave under poor connectivity, whether they implement proper timeouts, and if retry logic functions correctly.
Combine throttling with proxy server testing to understand how latency-sensitive applications perform when routing through proxy infrastructure. Applications requiring real-time responses need careful optimization when used with proxy services that add connection overhead.
Automating Charles Proxy with Scripts
Advanced users automate charles proxy on android workflows using Charles's command-line interface and recording automation. The charles-cli tool enables scripted session recording, export automation, and continuous monitoring scenarios.
Create bash or PowerShell scripts that launch Charles with specific settings, start recording, trigger Android app testing via ADB commands, and export results automatically. This automation proves valuable for continuous integration pipelines that need to verify network behavior across app builds.
The advanced features guide covers scripting examples and API integration patterns for teams requiring programmatic access to Charles functionality.
Mastering charles proxy on android unlocks powerful capabilities for mobile development, security testing, and network analysis throughout 2026 and beyond. Whether you're debugging API integrations, monitoring proxy service performance, or optimizing application network behavior, Charles provides the visibility needed for professional mobile development. For teams requiring reliable proxy infrastructure to test against, PinguProxy delivers high-speed datacenter, residential, and mobile proxies with complete IPv4 and IPv6 support, 10Gbps bandwidth, and 24/7 customer support to ensure your development and testing workflows run smoothly at scale.